Hoodoo Pedal Drive Assembly and Maintenance
Cory Byrnes
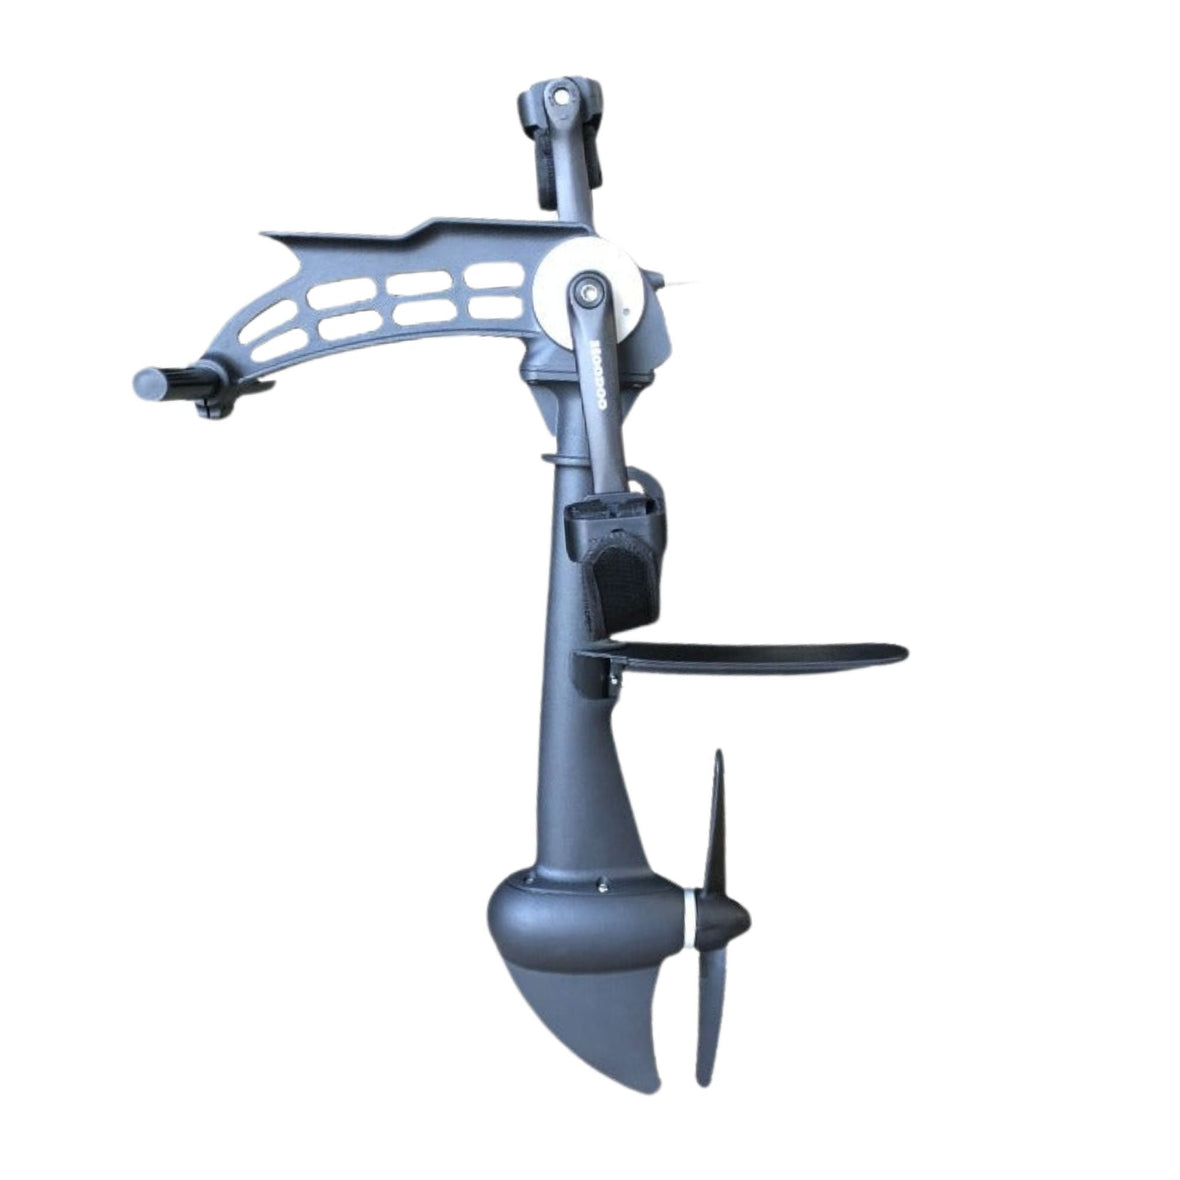
When you order your kayak from Hoodoo we package everything you need to get on the water quickly. There is still some assembly required for the Hoodoo Pedal Drive. Everything you need comes contained in one box. We even pack in a few extras. Here is the quick setup guide for the Hoodoo Pedal Drive so that you can get on the water and some DIY tips.
Assembly
The Hoodoo Pedal Drive will come in 3 main parts; 2 pedals left and right, the locking bar, and main drive. The bolts for the pedals will be in the pedal shaft.
Locking Bar
The locking bar is what stabilizes and secures your dive once you put it into place. It also acts as the pivot point for removing drive from the water. It is important that it it is secured in the middle so both ends extend evenly out each side.
- Remove the Locking bar from the packaging. Place the bar through the clamping ring on the front of the drive.
- Use a ruler or tape measure to make sure both sides of the bar extend evenly out either side.
- Use the Allen key provided to tighten the clamp ring and secure the stabilizing bar.
Note: There is no need for lock tight.
Installing Pedals
The pedals on the Hoodoo drive are side specific (check the back side of each pedal, the side it should be installed on is stamped left or right). The shaft for the pedals are keyed with a taper. The taper helps secure the pedal with the bolt. If you ever need to remove the pedal for transport or repair you will need a rubber mallet or a bearing puller.
- Remove the pedal bolts from the pedal shaft.
- Align the pedal arm to the pedal shaft and place it firmly in place.
- Replace the bolt on the right side of the pedal shaft.
- Replace the bolt on the left side of the pedal shaft. Note: the left side of the pedal shaft is left hand thread.
Note: you can use lock tight at these locations. If you choose to do so make sure it is not a permanent lock tight in case you need to make a repair.

Maintenance
The most important part of maintenance for the Hoodoo Pedal Drive is flushing it with clean water after every use. Especially after use in saltwater. There are a couple of other things you can do periodically to ensure a long useful life of your drive.
Upper and lower gear housing:
Both the upper and lower gear housing have a removable plate. It is good practice to check the tightness of the housings prior to use. Once a year it may be required to repack the housings with grease to protect them.
- Using a spanner, remove the gear housing cover.
- Once removed check the quality of the grease on the interior.
- It should be clean, without debris or metal shavings
- Using a soft cloth remove the grease in the housing.
- Replace the removed grease with a marine grade grease.
- Replace the gear housing cover o-ring if damaged is noted.
- Replace the gear housing cover. Use a bit of grease to keep the o-ring lubricated.
Note: Follow the same steps for the lower gear box.
Replacing the Prop:
Submerged structures like rocks, trees, and oyster reefs can damage your prop. A new one can be ordered online at Hoodoosports.com. To replace the prop follow the steps below.
- Remove the prop bolt using the provided allen key wrench.
- Remove the damaged prop
- Install the new prop
- Secure the new prop with the prop bolt using the allen key wrench.

DIY Ideas for your Hoodoo Pedal Drive
Extras! Who doesn’t like extras? As mentioned Hoodoo Sports provides you with some extra fasteners for your pedal drive. We think that one of the things that makes kayaks so versatile is the customization options are only limited by your imagination. Here are a couple ideas you can use the extra fasteners for.
We have predrilled and taped holes in the top plate of the drive. This is perfect place to install a fish finder, cup holder, rod holder, or tackle tray for easy access. If you install a fish finder the transducer can be installed directly below the skeg of the drive. There you will need to drill your holes to install the transducer. The power can come from a battery directly under your seat making it a very clean and neat setup.
If you like filming or taking those hero shots to capture the moment. The top plate is also a great place to install a camera mount. There are many more options to utilize that space on your drive. Comment if you have one that works for you.
Conclusion
All drive parts are available at the Hoodoo online store. If you cannot find or do not know what you might need to fix your drive. Or if you just need help getting your drive ready again to be on the water. You can always call and speak to one of our experts, and they can get what you need on order.


